Alexander the Great’s campaign in
Into the
Scenarios for the
Alexander the Great’s campaign in Afghanistan
Additions to the
Warhammer Alexander the Great supplement
By Jeff Jonas
"When the
report of this reached Alexander, he was chagrined at the loss of his soldiers, and
resolved to march with all speed against Spitamenes and his barbarian adherents. He
therefore took half of the Companion cavalry, all the shield-bearing guards, the archers,
the Agrianians, and the lightest men of the phalanx, and went towards Maracanda, where he
ascertained Spitamenes had returned and was again besieging the men in the citadel. Having
travelled 1,500 stades in three days, at the approach of dawn on the fourth day he came
near the city ; but when Spitamenes and his party were informed of Alexander’s
approach, they did not remain, but abandoned the city and fled."
Arrian**
Prologue:
When Alexander the Great’s advance scouts found the body of Darius executed by Bessus
and his Bactrian and Sogdian princes, it seemed the war against
As Alexander pressed onward, he
found the regions of Sogdiana and
|
The Alexander the Great supplement
lacks a set of beginner’s scenarios, this happened because The author wanted to
include as much data as possible into the space available, and big battles were included
because they were the essence of Alexander’s wars, and those orders of battle are
helpful guides to building his army. This group of scenarios is offered
to remedy that lapse. Notes: These beginner scenarios are set
up to allow a player to start his collections of Persians and Macedonians without having
to amass hundreds of models at the start. Some scenarios are set at a few dozen models,
while others begin to approach a normal game sized force of 2000 or so points. Some of the lists go outside the army list
composition regulations since these are set scenarios.
The other objective for each scenario is to attempt to help novice players with the
mechanics. The Frontier battles between
Alexander’s “hammer and anvil” style army versus the nimble
“asymmetrical” warriors of the steppes is a good environment to explore the
rules, even though the situations may be often unbalanced.
Players should note that some of these scenarios might be tough to win for one side
or the other, since sometimes they are focused on mechanics. These scenarios are a work in progress and will
change as they are adapted by play testing and I have more new photos available! |
|
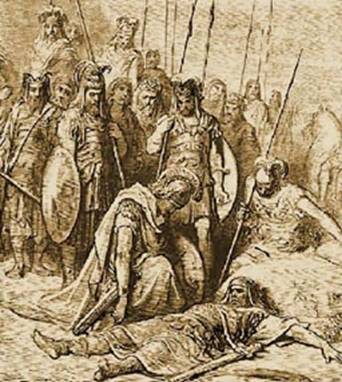
*Into the The lessons of Alexander’s
campaigns in Afghanistan are not lost today, and can be further explored in depth in Frank
L. Holt’s book “Into the Land of Bones”,
an excellent account of Alexander’s most costly and difficult war in Afghanistan. The bones refer to the grisly
practice that the Zoroastrians followed of leaving their dead and dying outside the city,
where carrion and dogs ate the carcasses. Surely
Alexander’s Greeks and Macedonians were ill prepared for such sights and one can
envision how they immediately came into conflicts with the culture of the area. |

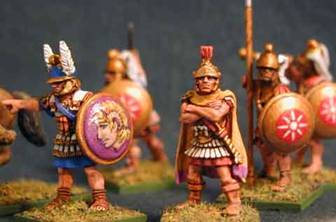
Wargames
Foundry 28mm Macedonian officers and Hypaspists. (Author’s collection)
"Meantime an army of the Asiatic Scythians arrived at the bank of the river Tanais, because most of them had heard that some of the barbarians on the opposite side of the river had revolted from Alexander. They intended to attack the Macedonians, if any revolutionary movement worthy of consideration were effected. News was also brought that Spitamenes was besieging the men who had been left in the citadel at Maracanda."
Arrian
Alexander’s War in
Afghanistan Scenarios
The Forces:
The Macedonian forces are chosen from the Warhammer Alexander the Great (AtG)
“Alexandrian Imperial” army list. The Rebels are chosen from the Frontier
Horsemen (AtG) and Persian (AtG) and Nomadic Hordes (Main Rulebook) army lists.
Special Rules for all scenarios:
Mercenary Greeks in these
scenarios count as imbedded troops in the Macedonian army and do not need a Polemarch to
use the army general’s leadership.
Frontier Horsemen, Nomadic Hordes, and Indian troops may use a Persian general’s
leadership, and vice versa. Units reduced to less than five models may rally in
these scenarios unless noted. Persian troops
ignore Levy status since they are Bactrians and Sogdians fighting on their home turf.
Scenario
One: The Lone Outpost
A Macedonian garrison has returned from fighting in
the nearby hills of
This scenario focuses on skirmish action, moving and
shooting, and fighting in buildings.
The troops:
Macedonians:
One Taxiarch, with light armor, shield and sword. The Taxiarch counts as the army
general.
10x Greek mercenary peltasts, sword, shield, and javelin. (LM)
8x Mercenary archers, sword, bow, and buckler. (L)
8x Thracian javelinmen, sword, javelin, and buckler (L)
The outpost:
In the table center is the outpost which is 8” from a well. The outpost consists of
one mud brick building with one access door facing the well, and one window per
facing. Next to this is a rough stone wall in an angle of 4” by 4”. The
light wood must be at least 6” from the outpost.
Cavalry may not enter the building but may fight against a door. Up to 16 models may
occupy the building. An unlimited number of routed models may occupy the
building. Fleeing Macedonian troops will run towards the outpost. Once inside
they may rally on the Taxiarch’s leadership if he is still alive. Combat and
Pursuit into the building is different than normal. Troops may only enter at doors,
and if attackers win a combat at the doorway and the defender’s break then occupants
are not eliminated (unless every model in the building is broken). In the next phase
the attackers move as many models inside as possible and count as charging, individual
models contacted that were fleeing are eliminated. Mounted attackers count as
dismounted if they enter a building, their horse is lost for the rest of the game.
See the rules for fighting in buildings on page 69.
If the Rebels control the well the Macedonians suffer -1 to all Combat Results. Control is
defined by having more models within 6" than the enemy.
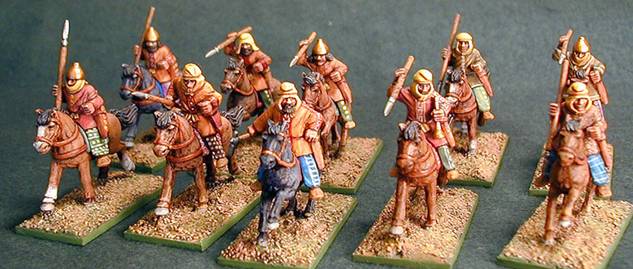
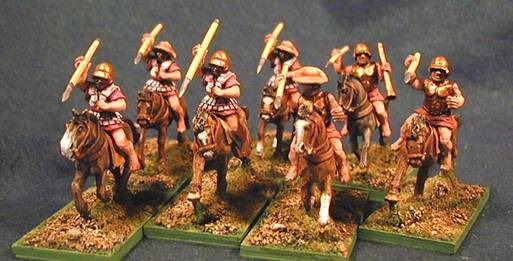
Vendel
miniatures 28mm Persian cavalry will work well as Sogdian and Bactrian horsemen.
(Author’s collection)
Rebels:
Persians (page 92)
One Rebel warlord. Use a Persian Satrap with warhorse hand weapon, heavy armor, throwing
spear, bow, half barding. The Satrap counts as the army general.
Frontier Horsemen (AtG)
10x Sogdian Nomad horse archers,
sword, bow. (LM)
10x Sogdian Footmen archers, sword, bow. (L)
12x Sogdian Footmen javelinmen, sword, javelin, buckler. (LMS)
12x Sogdian Footmen javelinmen, sword, javelin, buckler. (LMS)
Special Rules:
This is a small scenario meant to be played as a solitaire session, or quick introductory
game. This is a skirmish, all troops are individual models, and may be split up and do not
need to stay within 2” of each other. However for panic the original unit and
its size is counted. For example four archers are along the wall and four are inside
the outpost, if the archers are destroyed along the wall the archers inside the outpost
must test panic for this.
Set-up:
The Macedonians set up first within 12” of the outpost. The Rebels deploy
second and move first.
Terrain:
There are up to two hills and one area of light woods of less that 12” in diameter
allowed. The Rebel player places the terrain anywhere that is not within 6” of the
centerline of the table. The hills may have rugged escarpments on half their edges, and
these edges count as obstacles. A small stream bisects the table from north south, this is
only an obstacle to movement.
Victory:
The Macedonians win a propaganda victory if they survive through 6 turns.
The Rebels win decisively if they capture the outpost.
The Rebels only win a propaganda victory if they hold the well.
The scenario is a draw if neither Rebel victory condition is fulfilled.
![]()
![]()
![]()
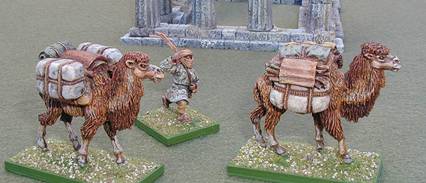

Castaway
Arts 28mm pack mules and drovers, and Copplestone Collection’s fine Bactrian camels.
(Author’s collection)
"Then Spitamenes, having received a
reinforcement of 6oo Scythian horsemen, was further emboldened by the Scythian alliance to
wait and receive the Macedonians who were advancing upon him. Posting his men in a level
place near the Scythian desert, he was not willing either to wait for the enemy or to
attack them himself; but rode round and discharged arrows at the phalanx of
infantry."
Arrian
Scenario
Two: Convoy
This scenario focuses on moving and shooting.
A Macedonian garrison has been attacked and forced to retreat to a fort near
The troops:
Macedonians:
One Hipparch, with warhorse heavy armor, xyston. The Hipparch counts as the army
general.
20x Hypaspists armed with sword, spear, large shields and light armor. (LMS) (phalanx,
drilled and stubborn) (May begin the game in column)
12x Greek Peltasts, sword, shield, and javelin. (LM)
6x Cretan archers, sword, bow and shield. (L)
8x Mercenary Skirmishers, sword, javelins, and buckler (L)
8x Greek cavalry, light armor and javelin. (LMS)
Supply caravan:
x4 camels and/or pack mules with x2 drovers with daggers (use the stats of the Peltasts),
and x4 caravan guards armed with swords, shield, light armor, and javelins (use the
stats of the Hypaspists). Camels, guards and drovers, move 6”, and may double
move. This unit counts as skirmishers, and may not charge. Each camel has four cargo
points which count as wounds. Randomize missile hits between drovers/guards and pack
animals: 1-4 pack animal, 5-6 guards. As long as the guards are in place the
pack animal test on the guards leadership, if only drovers are left then they test on the
drover’s leadership (who may not use the Hipparch). Pack animal and camels use
the stats of a warhorse, but have no attack stat. If charged, the guards will defend the
pack animals like war machines, the drovers will not fight unless they are the only models
left. The guards have a leader model.
If the caravan has no guards or drovers, and is in contact with the enemy they are
captured if no other friendly troops are in contact. The cargo is captured if pursued by
the enemy. The cargo can be recaptured.
Rebels:
Persian:
One Rebel warlord. Use a Persian
Satrap with warhorse heavy armor, throwing spear, bow, half barding. The Satrap
counts as the army general.
12x Bactrian Noble cavalry (Levy Shock cavalry), sword, short bow, throwing spear. Light
armor, shield, half barding. (LMS)
Frontier Horsemen
10x Sogdian Nomad horse archers, sword, bow. (LM)
8x Sogdian Footmen archers, sword, bow. (L)
12x Sogdian Footmen javelinmen, sword, javelin, buckler. (LMS)
Nomadic Hordes Cavalry
10x Nomad Horse Archers (Skythians), sword, bow, javelin, buckler. (LM)
Set-up:
The Macedonians set up first. The Rebels deploy second and move first.
Terrain:
There are up to two hills and one area of scrub of less that 12” in diameter allowed.
The Rebel player places the terrain anywhere that is not within 6” of the centerline
of the table. The hills may have rugged escarpments on half their edges, and these edges
count as obstacles.
Victory:
The Macedonians win decisively if they get 8 cargo points off the Southern edge on or
before turn 6.
All baggage remaining on the table, captured or routed off the table, counts as captured
at the end of turn 6.
The Rebels win decisively if they capture all the baggage intact.
The Rebels only win a propaganda victory if the Macedonians get any cargo points off the
table edge.
![]()
![]()
![]()
Wargames Foundry 25mm Greek cavalry work
well as Mercenaries. (Author’s collection)
"The Macedonians being thus
encompassed with difficulty on all sides, fled for refuge into one of the small islands in
the river, where they were entirely surrounded by the Scythians and the cavalry of
Spitamenes, and all killed with arrows, except a few of them, whom they reduced to
slavery. All of these were afterwards killed."
Arrian
Scenario
Three: Survival
A larger action where the rebels are joined by
Skythian nomad allies. It is a pursuit, so their will be lots of fleeing!
While Alexander marched to the Jaxartes to battle the Skythians, a Macedonian relief
column sent by Alexander to Maracanda has been wiped out. Small groups have survived the
massacre along the river Polytimetus and are desperately trying to find their way back to
safe haven at Maracanda. This band has been able to hold together some sense of
discipline, but as the dust clouds over the horizon signal that the rebels have caught up,
they are seized with panic. Their leader Amenander seizes a banner and tries to exhort
them to stay together. The Bactrian and Sogdian rebels, with their Skythian allies are
searching for them.
The troops:
Macedonians:
One Hipparch, with warhorse, sword, heavy armor, xyston. The Hipparch counts as the
army general.
One Army Standard Bearer, with warhorse, sword, heavy armor.
9x Companion cavalry, sword, heavy armor, and xyston. (LMS)
8x Greek mercenary cavalry, sword, light armor, and javelin. (LMS)
24x Pezhetairoi armed with sword, pike, shield
and light armor. (LMS)
12x Greek Peltasts, sword, shield, and
javelin. (LM)
6x Cretan Archers, sword, bow and shield. (L)
6x Mercenary Skirmishers, sword, javelinmen, and buckler (L)
6x Thracians, sword, javelins, and buckler (L)
Rebels:
Persians:
One Rebel warlord. Use a Persian Satrap with warhorse heavy armor, throwing spear, bow,
half barding. The Satrap counts as the army general.
One Rebel Army Standard Bearer. Use a Persian ASB with warhorse heavy armor, bow, half
barding.
12x Bactrian Noble cavalry (Levy Shock cavalry), sword, short bow, throwing spear. Light
armor, half barding. (LMS)
12x Sogdian
Noble cavalry (Levy Shock cavalry), sword, short bow, throwing spear, and shield. (LMS)
Frontier Horsemen
10x Sogdian Horse
archers, sword, bow. (LM)
12x Sogdian Footmen, sword, bow. (L)
12x Sogdian Footmen, sword, javelin, buckler. (LMS)
Nomadic Hordes Cavalry
10x Nomad Horse Archers (Skythians),sword, bow, javelin, buckler. (LM)
Special Rules:
All the Macedonian troops are deployed as formed but count as fleeing at game start. The
Hipparch counts as having passed his panic check. On turn one all the Macedonian units may
use the Hipparch’s leadership to rally (even skirmishers within 12”). Units that
rally may not form column on turn one. Troops that fail to rally move toward the south
edge.
Set-up:
The Macedonians set up first within 20” of the North side of the table. The
Rebels enter from the North end on turn one (Yes the same edge as the Macedonians). The
Nomadic cavalry enter from the west or east edge on turn one. Units entering the table may
not charge, but they may use triple march. The game starts with the rally phase of the
Macedonian player turn.
Terrain:
There are up to two hills and one area of scrub of less that 12” in diameter allowed.
The Rebel player places the terrain anywhere that is not within 6” of the centerline
of the table. The hills may have rugged escarpments on half their edges, and these edges
count as obstacles.
Victory:
The Macedonians win decisively if they get 32 or more models off the Southern edge,
(fleeing models count as survivors!). The Hipparch and ASB each count number of remaining
wounds per model for survival. The game has no turn limit.
The Rebels win decisively if no models escape off the south edge
The Rebels only win a propaganda victory if the Macedonians get 16 models off the table.
![]()
![]()
![]()
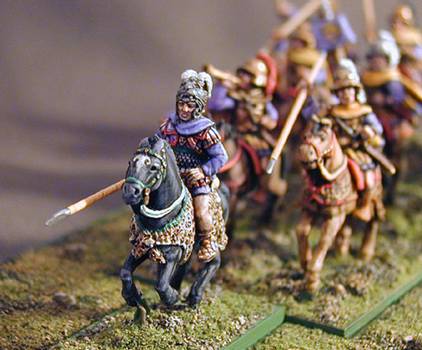
Newline Design’s 28mm Alexander leads a wedge of Old Glory
Companions. (Author’s collection)
"When Coenus
ascertained that Spitamenes was advancing with his cavalry, he went to meet him with his
army. A sharp contest ensued, in which the Macedoniatis were victorious, so that of the
barbarian cavalry over 300 fell in the battle, while Coenus lost twenty-five horsemen
and twelve foot-soldiers. The consequence was, that the Sogdianians who were still left
with Spitamenes, as well as most of the Bactrians, deserted him in the flight, and
came to Coenus to surrender."
Arrian
Scenario
Four: Quick
Reaction Force
A heavy force of
Macedonians corner the rebels as they retreat loaded down with baggage and plunder.
By now, Alexander had separated his forces into flying columns to pin and bag the rebels.
This action is based on mopping up resistance as the Rebels retreat into the desert after
finding there is no place to hide since the locals have either shut their gates, or there
are Macedonian garrisons blanketing the region. The
Rebels need the supplies to tide them over as they try to take refuge in the Karakuny
desert.
The troops:
Macedonians:
Cavalry Forces:
One Strategos, with warhorse, sword, heavy armor, xyston. He is the
army general.
One Army Standard Bearer, with warhorse, sword, heavy armor.
10x Companion cavalry, sword, heavy armor, and xyston. (LMS)
10x Companion cavalry, sword, heavy armor, and xyston. (LMS)
8x Greek mercenary cavalry, sword, light armor, and javelins. (LMS)
8x Hippakontastai cavalry, sword, and javelins. (LMS)
Infantry Forces:
16x Hypaspists armed with javelins or thrusting spears, shield and light
armor. (LMS)
24x Pezhetairoi armed with pikes, shield and light armor. (LMS)
24x Pezhetairoi armed with pikes, shield and light armor. (LMS)
12x Greek Peltasts, shield, and javelins. (LM)
12x Cretan Archers, sword, bow and shield. (L)
12x Agrianian Skirmishers, sword, javelins, and buckler (L)
12x Mercenary Skirmishers, sword, javelins, and buckler (L)
Rebels:
Persian:
One Rebel warlord. Use a Persian Satrap with warhorse heavy armor, throwing spear, bow,
half barding. The Satrap counts as the army general.
One Rebel Army Standard Bearer. Use a Persian ASB with warhorse heavy armor, bow, half
barding.
12x Bactrian Noble cavalry (Levy Shock cavalry), sword, short bow, throwing spear. Light
armor, half barding. (Since these are operating in their home turf they do not count as
levies) (LMS)
12x Sogdian Noble cavalry (Levy Shock cavalry), sword, short bow, throwing spear, and
shield. (Since these are operating in their home turf they do not count as levies) (LMS)
Frontier Horsemen:
10x Sogdian Horse archers, sword, bow. (LM)
12x Sogdian Footmen archers, sword, bow. (L)
12x Sogdian Footmen javelinmen, sword, javelin, buckler. (LMS)
Skythian Nomadic Hordes:
1x Army Standard Bearer, sword, bow, heavy armor, javelin, buckler, half barding.
(The Army Standard Bearer counts as a sub-general the troops below, they are unaffected by
the Rebel Warlord.)
10x Noble Cavalry (Skythians),sword, bow, javelin, light armor, barding. (LMS)
10x Nomad Horse Archers (Skythians),sword, bow, javelin, buckler. (LM)
Plunder and Baggage:
5x Camels and or Pack Mules, led by 5 drovers with sword and bows.
Special Rules:
The Rebels have been caught flat footed and may not charge, or march, or double
move on turn one. The Rebel baggage may not march move at all during the
game. Persians troops ignore Levy status since they are fighting on their home turf. The
baggage is saved if it exits the North edge. The baggage and pack animals are
treated exactly as in Scenario Two (see above) but have no guards, just drovers. If the baggage is captured or eliminated, the
Skythian cavalry contingent desert the field and count as eliminated if they fail a
leadership test, since the plunder was all that they were interested in!
Set-up:
The Rebels set up first and are deployed in the center, within 12" of their
baggage and pack animals, which are deployed within 3" the center of the
table. See map for more details.
The Macedonians move first, their army is split and all troops enter on turn
one. The Infantry enter the south table edge. The cavalry enter either the west or
east edge. No Macedonians may charge on turn one, however units that march move or double
move may shoot.
Terrain:
There are up to two hills and one area of scrub of less that 12” in diameter allowed.
The Rebel player places the terrain anywhere that is not within 6” of the centerline
of the table. The hills may have rugged escarpments on half their edges, and these edges
count as obstacles.
Victory:
This is a Pitched Battle use the normal victory points. If the Macedonians capture the
baggage they gain and additional 100 pts.
![]()
![]()
![]()
References:
(** All quotes are from
Arrian’s campaigns of Alexander: http://websfor.org/alexander/arrian/book4a.asp
)
Luke Ueda-Sarson’s
interesting pages:
http://www.ritsumei.ac.jp/se/~luv20009/Gabai.html
http://www.ritsumei.ac.jp/se/~luv20009/GranicusNotes2.html
http://www.ne.jp/asahi/luke/ueda-sarson/Arrian4-4-6-7.html
|
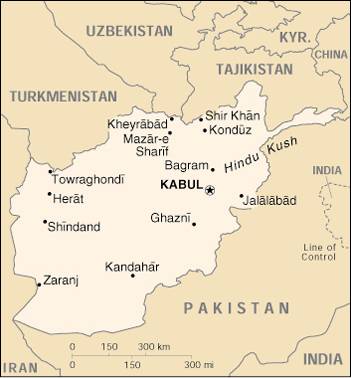
Alexander’s route of march from |

|
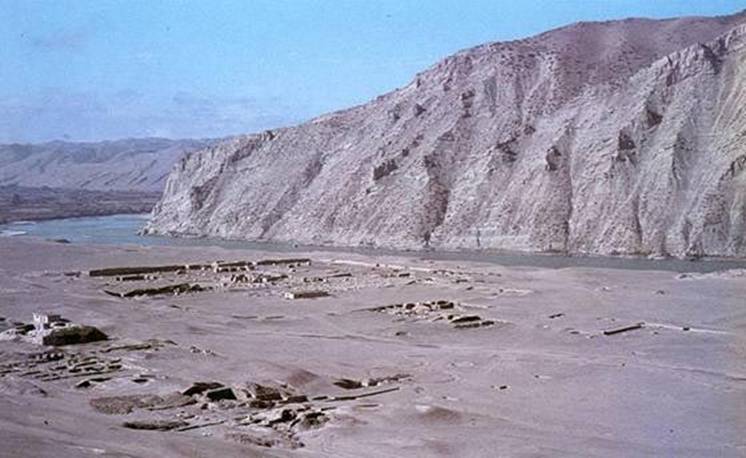
The ruins of the city of http://www.livius.org/aj-al/alexandria/alexandria_oxus-finds.html |
Other reading:
|
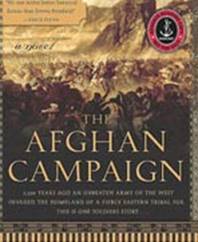
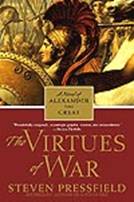
Stephen Pressfield also explores
Alexander’s difficult “Afghan Campaign”
along with his excellent “The Virtues of War” novel about Alexander the
Great. http://www.stevenpressfield.com/ |
Miniatures:
Plastic 1/72nd figures
are an excellent way to start miniature gaming on a budget. These models have never been
better!
http://www.plasticsoldierreview.com/PeriodAncient.html#Hellenistic
Interesting sidelights:
|
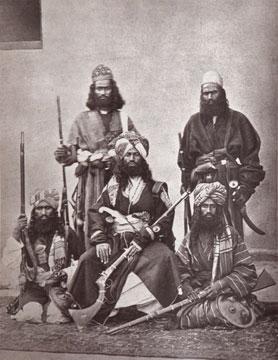
Baloch
warriors of the 1800’s, from http://sarbaaz.com/photos/displayimage.php?album=2&pos=3 |
|
Modern |
Modern Warfare goes back in time
near Mazar-i-Sharif:
http://www.mmartltd.com/gallery.asp?category=5

US forces on horseback
http://www.freerepublic.com/focus/f-news/571816/posts
http://www.time.com/time/world/printout/0,8816,184047,00.html
A story of fanaticism:
http://www.bouwman.com/911/Operation/Qala-I-Jangi.html
Can foreigners ever understand
Afghan politics? An interesting report on where the politics stood two years ago.
In our long war:
http://www.superpatriots.us/jack/lordsofwar.htm
email: jjonasartist@sbcglobal.net